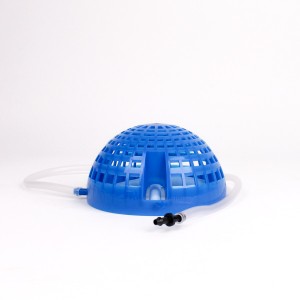
Autopot Air Dome
Delivering more air into the root zone.
The Autopot Air Dome has been designed to increase the amount of air around the root zone. This unit can be used for both the Autopot hydroponic system and traditional top feeding pots.
Once assembled this unit is very easy to use. The Air Dome is placed at the bottom of the pot, covered with yuor choice of growing media and then connected to an air pump.
Air Dome contents list:
1 x Air Dome body
1 x 6mm cross connector
4 x Pieces of blue bubble pipe
1 x 0.5m length of clear air line
1 x air line joiner
Instructions:
1.1 Take the 6mm cross connector and attach the 4 blue pieces of bubble pipe to it.
1.2 Then connect all four ends of the blue bubble pipe to the four connecting points inside the Air Dome
1.3 Finnaly, connect the clear air line to the outside point of the Air Dome. Heat the pipe in hot water to soften the pipe and allow for easy connection to the air dome.
1.4 Simply place the Air Dome at the base of your pot and cover with your medium of choice. It is advisable to use a "fluffy" mix, such as 50% soil or coco with 50% perlite. This will provide plenty of air pockets within the mix, maximising the effectiveness of the Air Dome.
- Using heavy soils or peat will not enhance the Air Dome, as they will become wet, heavy and compressed.
- The Air Dome should only be switched on during the daylight periods. Always ensure that warm air is blown in and around the root zone. Temperatures between 18 and 22 degrees are ideal. Temperatues below 5 degrees and above 30 degrees will potentially damage the roots.
- Raise your air pump higher than the Air Dome(s) to prevent water from siphoning back when the pump is off.
- Use a timer to turn the air pump on and off when when the air temperature is warm and before it gets cool.


